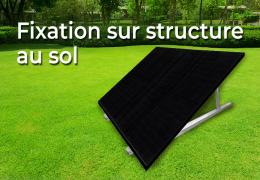
Discover our ground structure mounting kit for solar panels, a solution designed to guarantee a safe, stable, and durable installation. Specifically designed for panels ranging from 160 cm to 178 cm, this versatile kit is perfect for flat roofs, ground mounting, barges, or any other flat surface. Thanks to its intelligent design, it automatically adapts to the number of panels and the orientation (portrait or landscape) you select.
This kit includes all the necessary hardware for a reliable and robust assembly (ballast not included). The use of an anodized aluminum structure provides maximum protection against corrosion and ensures exceptional longevity against the elements.
Main features:
Customizable options: configure your installation by choosing the number of panels and the layout best suited to your space.
Please note: For configurations with multiple rows (e.g., 2 rows of 6 panels), you must order two separate mounting kits.

The components of the kit vary depending on the number of panels.Rail connectors are included for 2 landscape panels and 3 portrait panels (see table at the bottom of the page).
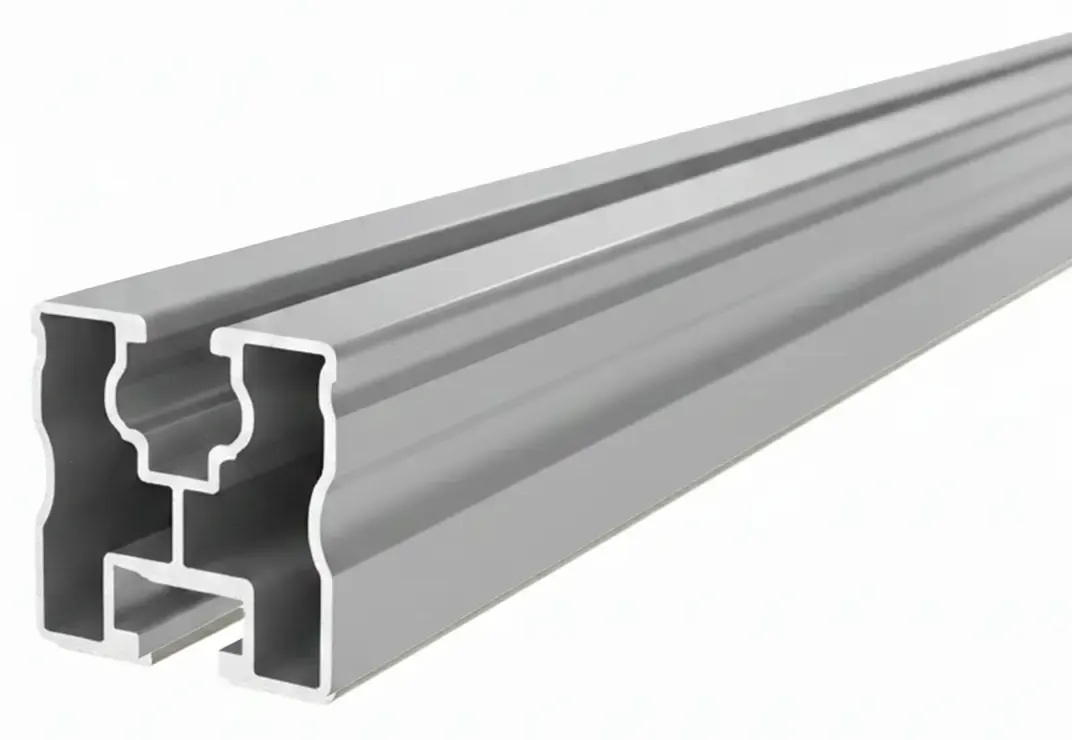
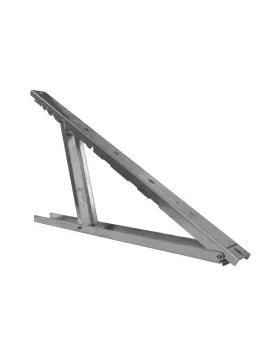
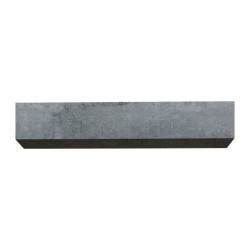
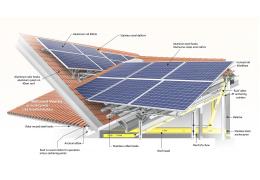
Main support providing the structure for the photovoltaic installation.
Product details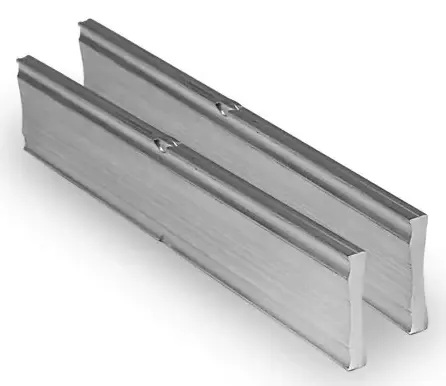
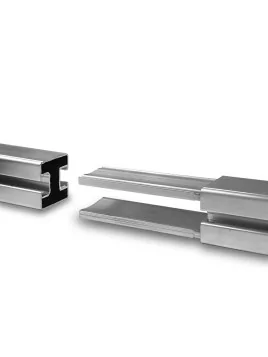
Rail assembly for longer rows. Included with two landscape panels and three portrait panels.
Product details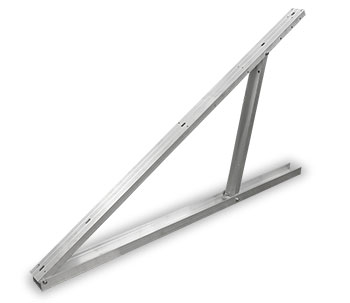
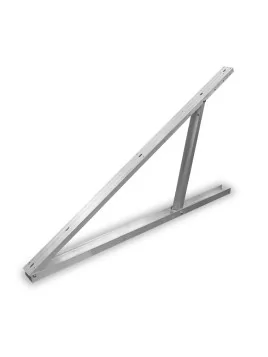
Triangular bracket supplied with the kit for portrait-oriented solar panels, allowing the aluminium rail to be fixed in place.
Product details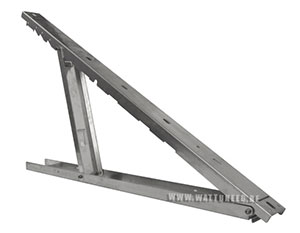
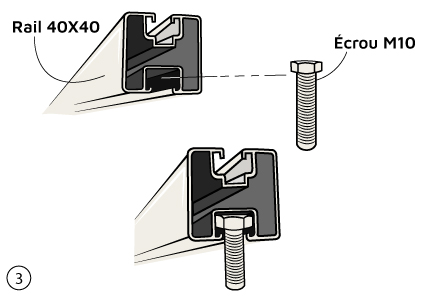
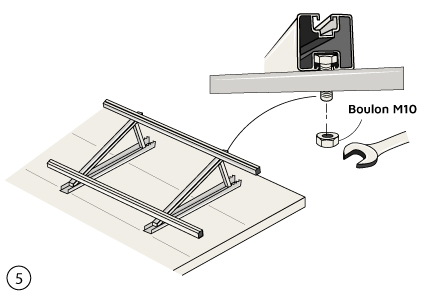
Enables quick manual tightening during installation.
Product details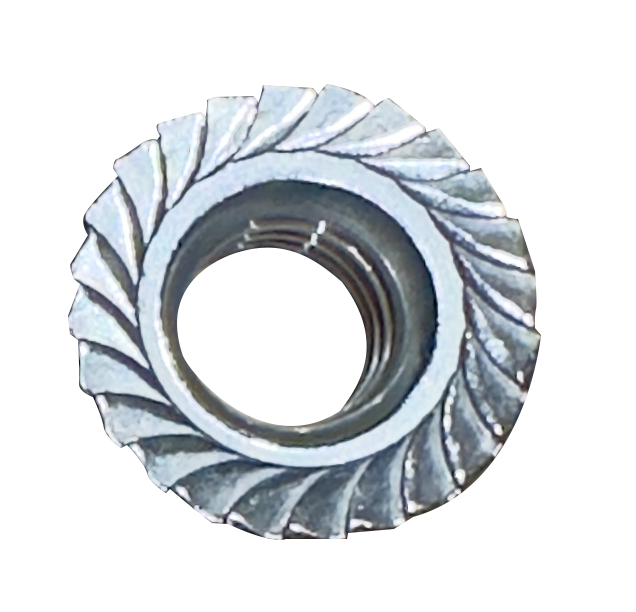
Enable quick manual tightening during installation.
Product details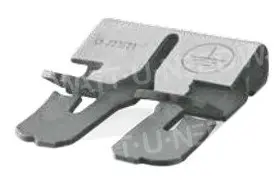
Ensure electrical continuity and grounding.
Product details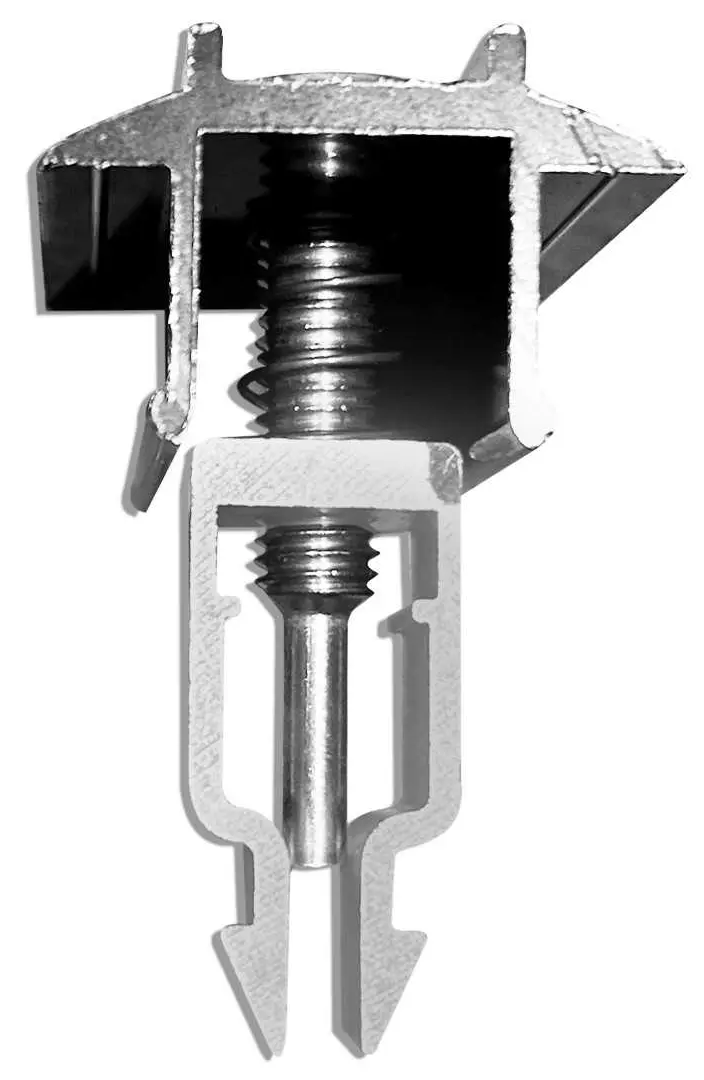
Quick fastening between each panel.
Product details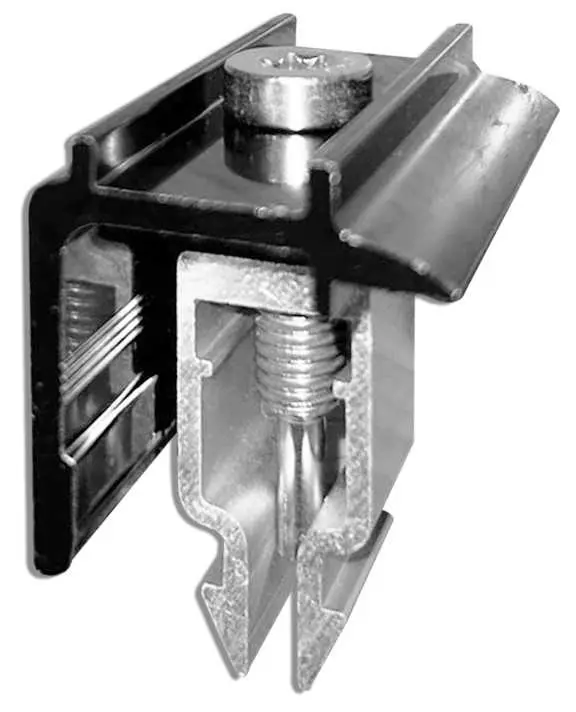
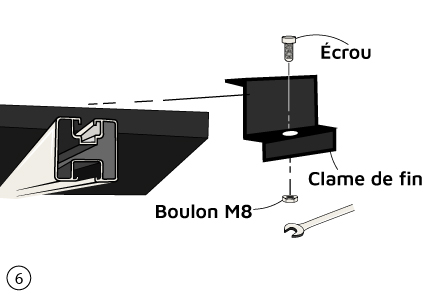
Securely holds panels at the end of the structure.
Product details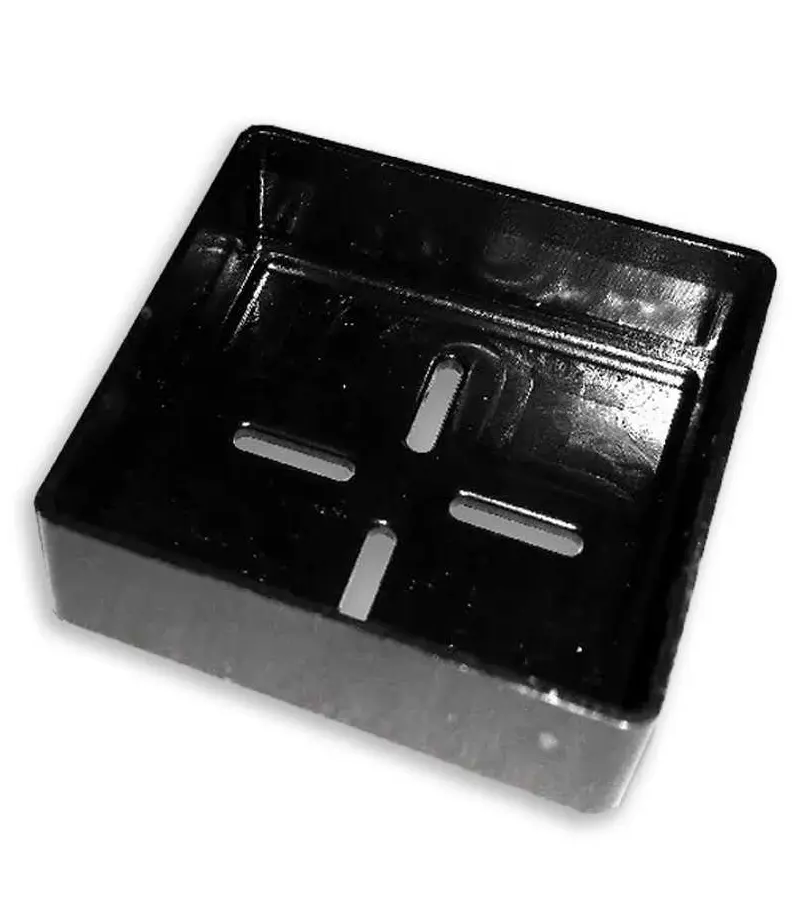
For an attractive finish and durable protection of mounting rails.
Product details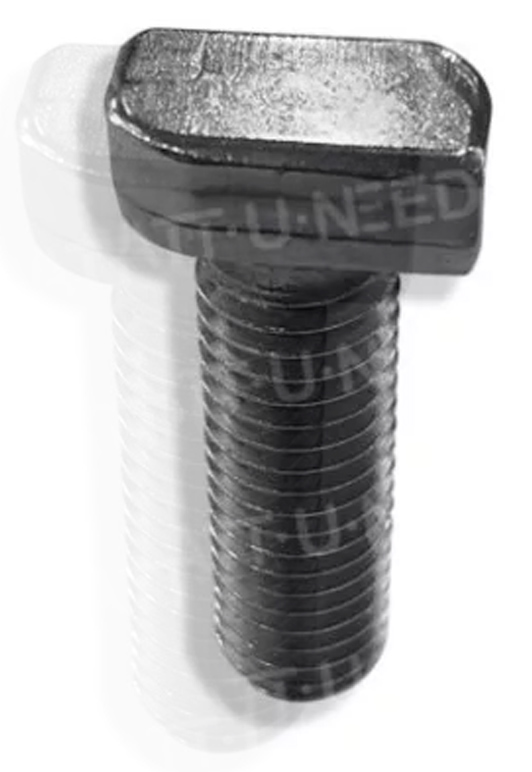
Ideal for reliable and easy fastening.
Product details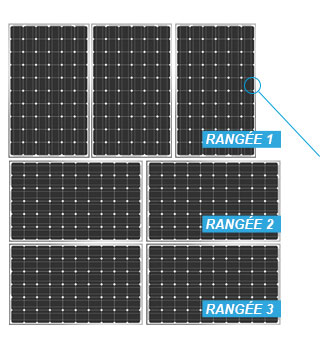
Multi-support mounting kit
Designed for great versatility, this kit can be installed on ground-mounted structures, flat roofs, terraces, as well as on houseboats. Thanks to its various mounting options, it easily adapts to the configuration and orientation of your panels.
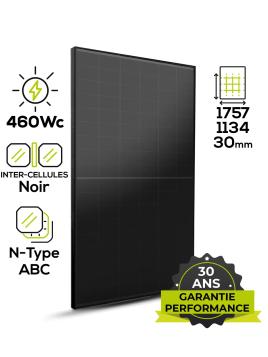
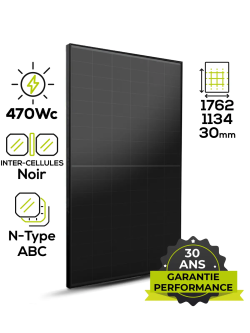
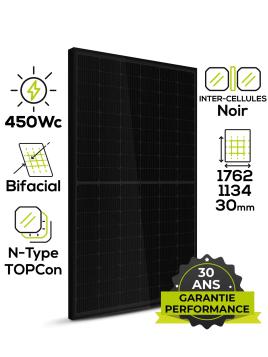
The mounting system is compatible with solar panels of standard dimensions, approximately 1.75 m × 1.14 m.
Choose the number of panels arranged in portrait or landscape format per row.
Example: the layout shown opposite requires 3x the Mounting Kit product:
The clamp is used to fix the panel to the aluminium rail. Its height must correspond to the thickness of your panel frame to ensure a secure hold.
Available heights: 28 - 30 - 35 - 40 - 45 - 50 mm
Portrait panels
| Number of panels | Rail (m) | Details of rails* | Junction | Large aluminium support | Middle clamp | End clamp | M10 hammer head bolt | M10 hexagonal nuts | Rayvolt | Rail plug |
|---|---|---|---|---|---|---|---|---|---|---|
| 1 panel | 2.4 | (2 x 1.20 m) | 0 | 2 | 0 | 4 | 4 | 4 | 1 | 4 |
| 2 panels | 4.8 | (2 x 2.40 m) | 0 | 2 | 2 | 4 | 4 | 4 | 2 | 4 |
| 3 panels | 7.2 | (4 x 1.80 m) | 2 | 3 | 4 | 4 | 6 | 6 | 3 | 4 |
| 4 panels | 9.6 | (4 x 2.40 m) | 2 | 4 | 6 | 4 | 8 | 8 | 4 | 4 |
| 5 panels | 12.0 | (4 x 2.40 m and 2 x 1.20 m) | 4 | 5 | 8 | 4 | 10 | 10 | 5 | 4 |
| 6 panels | 14.4 | (6 x 2.40 m) | 4 | 5 | 10 | 4 | 12 | 12 | 6 | 4 |
| 7 panels | 16.8 | (6 x 2.40m and 2 x 1.20m) | 6 | 6 | 12 | 4 | 14 | 14 | 7 | 4 |
| 8 panels | 19.2 | (8 x 2.40 m) | 6 | 6 | 14 | 4 | 16 | 16 | 8 | 4 |
| 9 panels | 21.6 | (8 x 2.40 m and 2 x 1.20 m) | 8 | 7 | 16 | 4 | 18 | 18 | 9 | 4 |
| 10 panels | 24.0 | (10 x 2.40 m) | 8 | 8 | 18 | 4 | 20 | 20 | 10 | 4 |
| 11 panels | 26.4 | (10 x 2.40 m and 2 x 1.20 m) | 10 | 8 | 20 | 4 | 22 | 22 | 11 | 4 |
| 12 panels | 28.8 | (12 x 2.40 m) | 10 | 9 | 22 | 4 | 24 | 24 | 12 | 4 |
| 13 panels | 31.2 | (12 x 2.40 m and 2 x 1.20 m) | 12 | 10 | 24 | 4 | 26 | 26 | 13 | 4 |
| 14 panels | 33.6 | (14 x 2.40 m) | 12 | 11 | 26 | 4 | 28 | 28 | 14 | 4 |
| 15 panels | 36.0 | (14 x 2.40m and 2 x 1.20m) | 14 | 11 | 28 | 4 | 30 | 30 | 15 | 4 |
| 16 panels | 38.4 | (16 x 2.40 m) | 14 | 12 | 30 | 4 | 32 | 32 | 16 | 4 |
| 17 panels | 40.8 | (16 x 2.40 m and 2 x 1.20 m) | 16 | 13 | 32 | 4 | 34 | 34 | 17 | 4 |
| 18 panels | 43.2 | (18 x 2.40 m) | 16 | 13 | 34 | 4 | 36 | 36 | 18 | 4 |
| 19 panels | 45.6 | (18 x 2.40 m and 2 x 1.20 m) | 18 | 14 | 36 | 4 | 38 | 38 | 19 | 4 |
| 20 panels | 48.0 | (20 x 2.40 m) | 18 | 15 | 38 | 4 | 40 | 40 | 20 | 4 |
* Rail details are provided for information purposes only and depend on the size of the panels.
Panels in landscape format
| Number of panels | Rail (m) | Details of rails* | Junction | Small aluminium support | Middle clamp | End clamp | M10 hammer head bolt | M10 hexagonal nuts | Rayvolt | Rail plug |
|---|---|---|---|---|---|---|---|---|---|---|
| 1 panel | 3.6 | (2 x 1.80 m) | 0 | 2 | 0 | 4 | 4 | 4 | 1 | 4 |
| 2 panels | 7.2 | (4 x 1.80 m) | 2 | 3 | 2 | 4 | 6 | 6 | 2 | 4 |
| 3 panels | 10.8 | (6 x 1.80 m) | 4 | 4 | 4 | 4 | 8 | 8 | 3 | 4 |
| 4 panels | 14.4 | (8 x 1.80 m) | 6 | 5 | 6 | 4 | 10 | 10 | 4 | 4 |
| 5 panels | 18 | (10 x 1.80 m) | 8 | 6 | 8 | 4 | 12 | 12 | 5 | 4 |
| 6 panels | 21.6 | (12 x 1.80 m) | 10 | 7 | 10 | 4 | 14 | 14 | 6 | 4 |
| 7 panels | 25.2 | (14 x 1.80 m) | 12 | 8 | 12 | 4 | 16 | 16 | 7 | 4 |
| 8 panels | 28.8 | (16 x 1.80 m) | 14 | 9 | 14 | 4 | 18 | 18 | 8 | 4 |
| 9 panels | 32.4 | (18 x 1.80 m) | 16 | 10 | 16 | 4 | 20 | 20 | 9 | 4 |
| 10 panels | 36 | (20 x 1.80 m) | 18 | 11 | 18 | 4 | 22 | 22 | 10 | 4 |
| 11 panels | 39.6 | (22 x 1.80 m) | 20 | 12 | 20 | 4 | 24 | 24 | 11 | 4 |
| 12 panels | 43.2 | (24 x 1.80 m) | 22 | 13 | 22 | 4 | 26 | 26 | 12 | 4 |
| 13 panels | 46.8 | (26 x 1.80 m) | 24 | 14 | 24 | 4 | 28 | 28 | 13 | 4 |
| 14 panels | 50.4 | (28 x 1.80 m) | 26 | 15 | 26 | 4 | 30 | 30 | 14 | 4 |
| 15 panels | 54 | (30 x 1.80 m) | 28 | 16 | 28 | 4 | 32 | 32 | 15 | 4 |
| 16 panels | 57.6 | (32 x 1.80 m) | 30 | 17 | 30 | 4 | 34 | 34 | 16 | 4 |
| 17 panels | 61.2 | (34 x 1.80 m) | 32 | 18 | 32 | 4 | 36 | 36 | 17 | 4 |
| 18 panels | 64.8 | (36 x 1.80 m) | 34 | 19 | 34 | 4 | 38 | 38 | 18 | 4 |
| 19 panels | 68.4 | (38 x 1.80 m) | 36 | 20 | 36 | 4 | 40 | 40 | 19 | 4 |
| 20 panels | 72 | (40 x 1.80 m) | 38 | 21 | 38 | 4 | 42 | 42 | 20 | 4 |
* Rail details are provided for information purposes only and depend on the size of the panels.
Yes, this kit is designed to be easily installed by anyone with some DIY skills.
Yes, all components are made of stainless steel with an anti-corrosion coating, ensuring optimal resistance to rain, wind and UV rays.
Yes, the kit is compatible with most standard solar panels, providing stable and secure mounting for ground-mounted or flat roof installations.
Yes, this kit can be installed on a flat roof, following the ballast recommendations to ensure the stability and safety of the structure.
Yes, ballast is necessary depending on the surface area, type of soil or flat roof, and local wind strength. The guide provided indicates the recommended weight and how to attach the ballast.
Yes, it is possible to adjust the angle to optimise sun exposure and energy production, whether on the ground or on a flat roof.
It is suitable for stable, flat surfaces (concrete, compacted gravel, stabilised soil). For loose or unstable surfaces, additional reinforcement or ballasting may be necessary.
The tools required are standard: drill, spanner, screwdriver and possibly pliers. No special tools are required.

Step-by-step instructions for ground-mounted installation
This guide takes you through the complete installation of your photovoltaic mounting kit. Follow each step methodically to ensure a safe and long-lasting installation.
Your photovoltaic system is now ready. Please make a final check of all fastenings and panel alignment before commissioning.
 Ground mounting kit: A complete guide to your solar installation
 Eurocode and solar panel fixings: standards and safety
Ground mounting kit for solar panels measuring 160 cm to 178 cm by Wattuneed is available in our Mounting systems catalog. Technical specifications: mounting: Flat roof - floor structure. Product weight: 0.1 kg. Reference: 08081.


check_circle
check_circle