Installation guide Photovoltaic mounting kit for slate roofs
Step-by-step instructions for installation on a slate roof
Before you start
Installation on a slate roof requires special precautions. Slate is more fragile than tiles, so a specialised, methodical approach is essential. If you have any doubts about the technique or the strength of the roof, you should always consult a qualified professional.
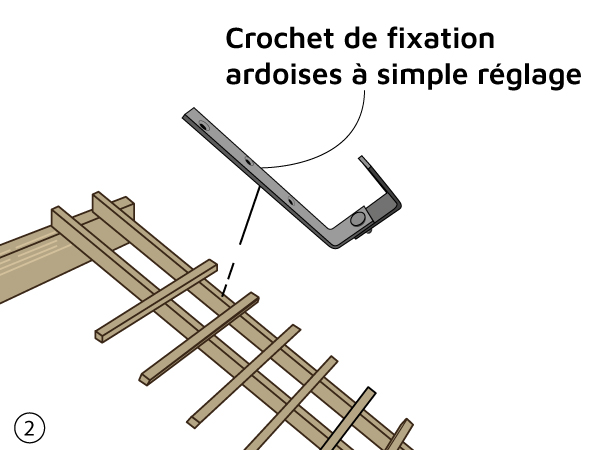
1 FITTING SLATE HOOKS
Equipment
Specialist slate hooks, anti-corrosion stainless steel screws, rafter detector, specialist slate tools.
Installation
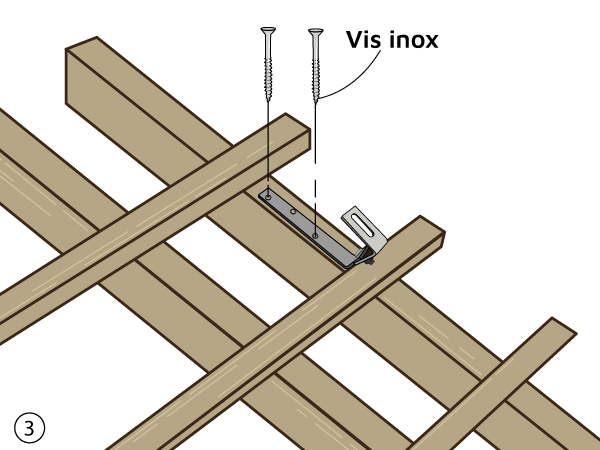
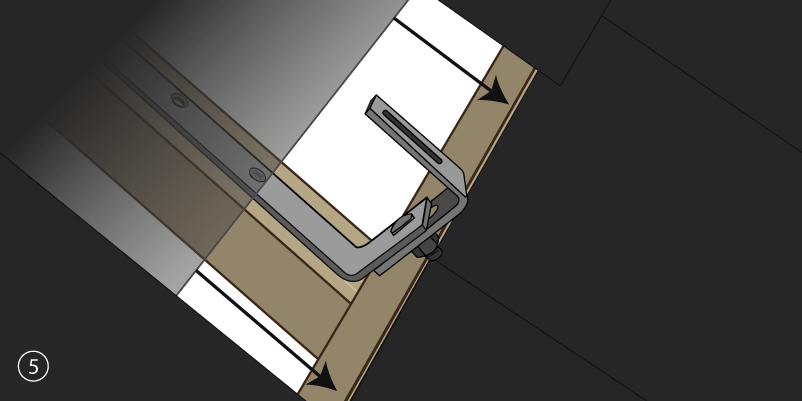
1. Locating: Use a structure detector to precisely identify the rafters.
2. Positioning: Place the hook in a protected area of the slate, avoiding the edges.
3. Preparation: Gently grind the lugs if necessary, without weakening the slate.
4. Fixing: Screw into the rafter using stainless steel screws only, flush with the batten.
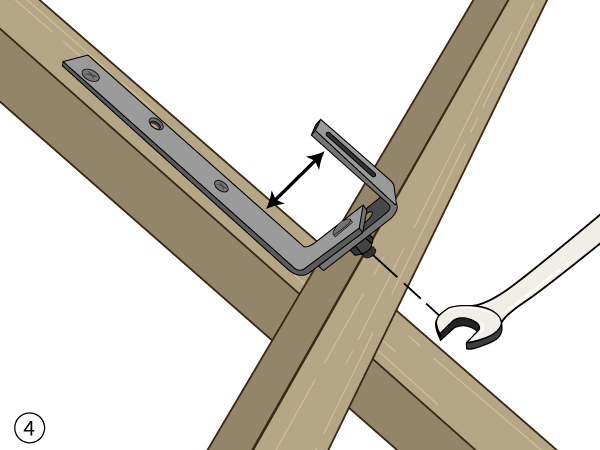
5. Adjustment: Adjust the height using the vertical adjustment system.
6. Finishing: Carefully replace the top slate.
⭐ Specific slate features
- Fragility: Gentle handling mandatory
- Watertightness: Absolute respect for integrity
- Fixing: Reinforced anchoring points
✅ Inspections
Intact slates
Solid fixing
Stainless steel screws used
Height adjusted
2 INSTALLING THE ALUMINIUM RAILS
Materials
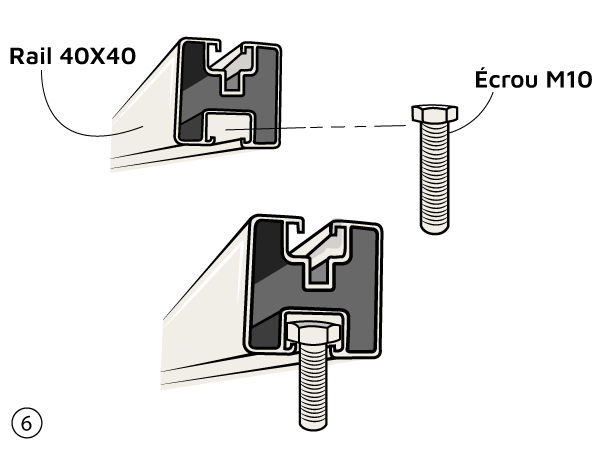
40x40 aluminium rails, M10 bolts, fixing nuts, suitable spanner
Installation
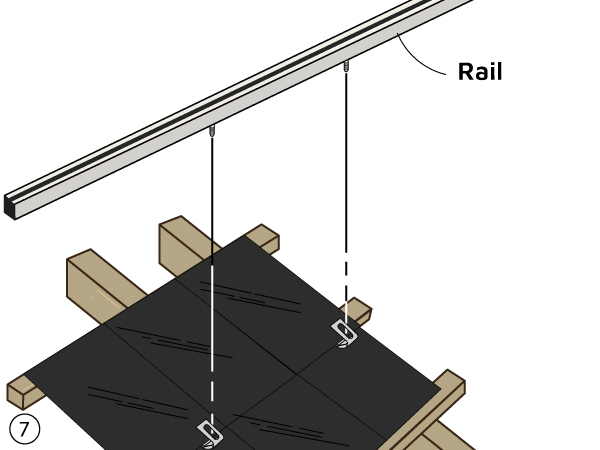
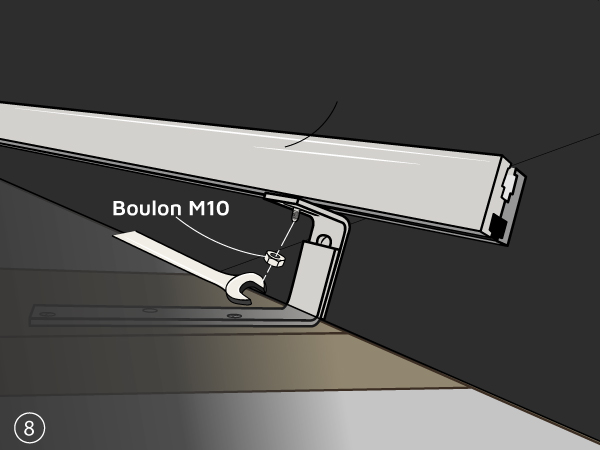
1. Insertion: Slide an M10 bolt into the square guide of the rail.
2. Connection: Insert the bolt into the oblong hole in the hook.
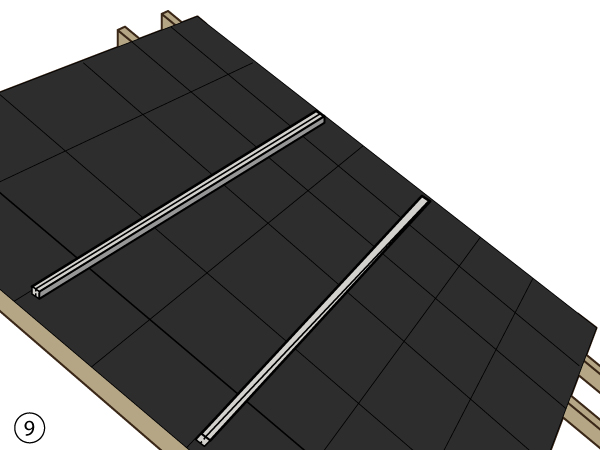
3. Alignment: Check that all rails are perfectly aligned.
4. Tightening: Fasten permanently after checking that everything is in place.
⭐ Advantages of aluminium rails
- Lightness: Reduced load on the slate
- Precision: Exact sliding system
- Durability: Optimum weather resistance
✅ Controls
Rails aligned
Bolts tight
Perfect parallelism
Stable fixing
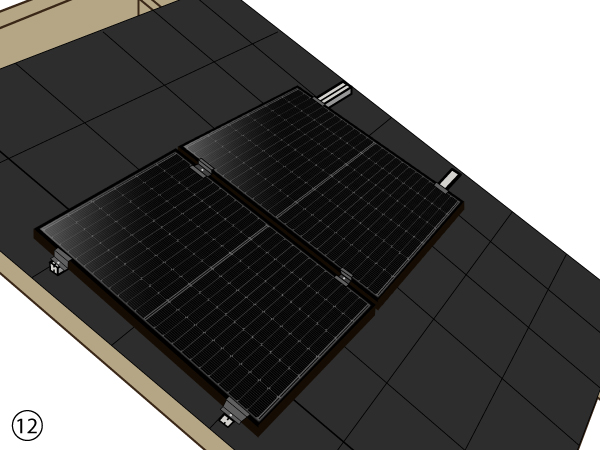
3 FITTING THE SOLAR PANELS
Materials
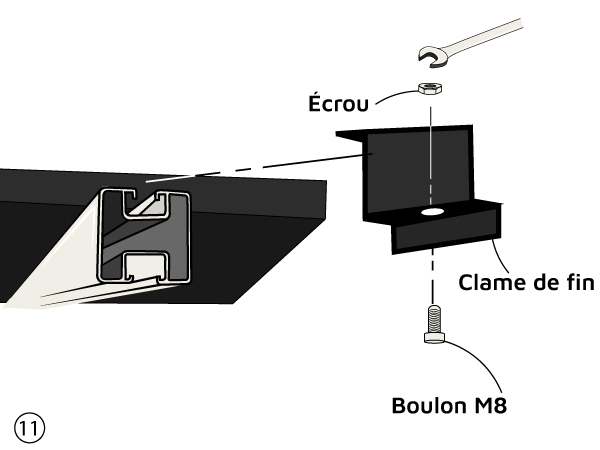
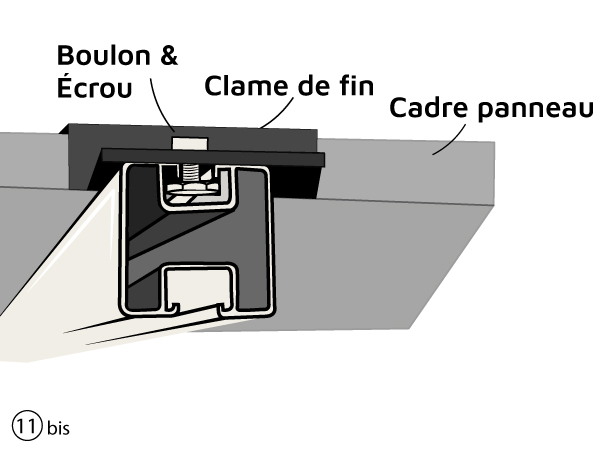
Solar panels, end clamps (4), middle clamps (depending on configuration), M8 bolts
⚙️ Configuration
1 panel: 4 end clamps at the 4 corners
Several panels: 4 end clamps + middle clamps between panels
Installation
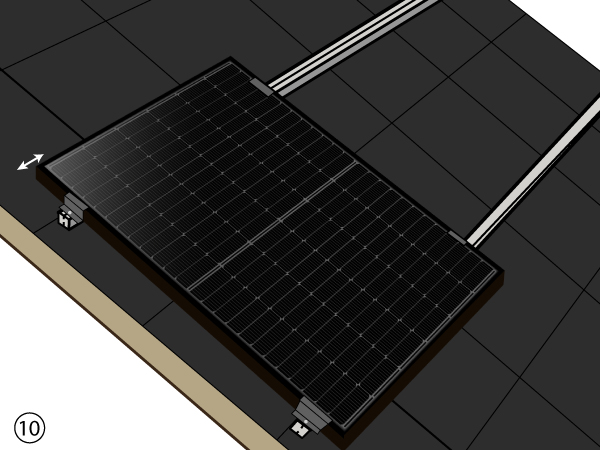
1. Starting point: Start at an outer edge with a 1 cm margin.
2. Fixing: Install two external fixing clamps at the ends.
3. Checking: The panel must be perfectly parallel to the ridge.
4. Extension: Add the following panels with middle clamps
⭐ Advantages
- Safety: Optimum hold on slate
- Adaptability: Flexible modular system
- Accuracy: Perfect alignment guaranteed
✅ Controls
Slates positioned
Margin respected
Ridge parallelism
Stable installation
Installation complete!
Your photovoltaic system on a slate roof is now ready. Carry out a complete check of the watertightness and all tightenings before commissioning.
⚠️ For safety reasons and to guarantee watertightness, always have your installation checked by a qualified professional specialising in slate roofs.
2025 WattUNeed - Slate photovoltaic installation guide