🏁 Before you start
This guide takes you through the complete installation of your photovoltaic tile roof mounting kit. Follow each step methodically to ensure a safe, long-lasting installation.
📦 Hardware
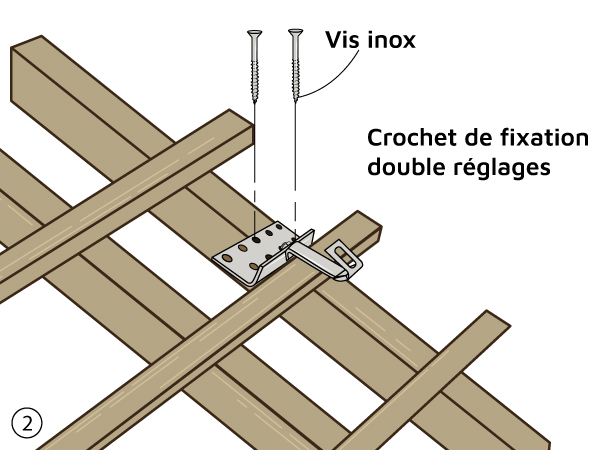
Double-adjustable tile hooks, stainless steel screws, drill, wood bit
🔧 Installation
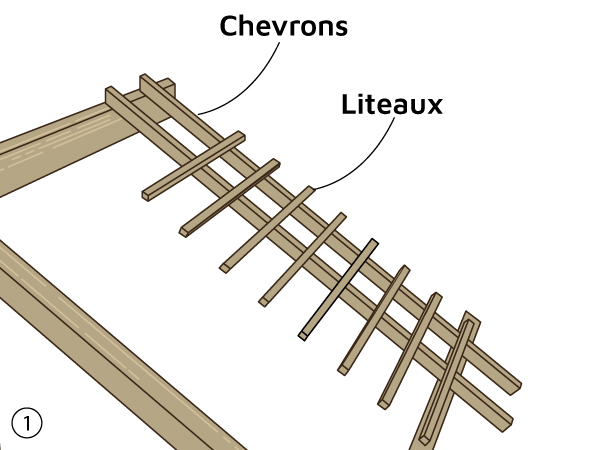
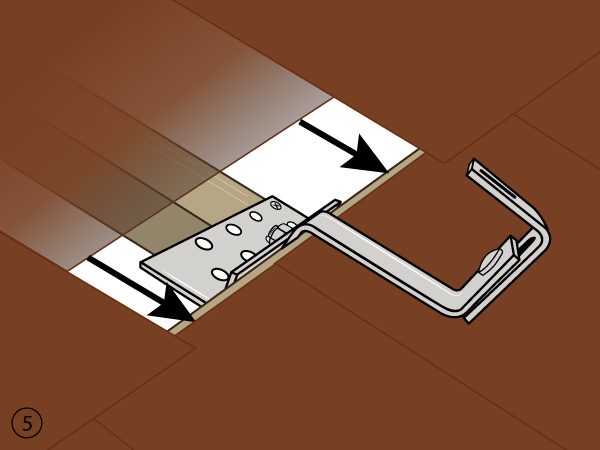
1. Marking: precisely identify rafters for secure fixing
2. Positioning: Place the hook in the hollow of a tile.
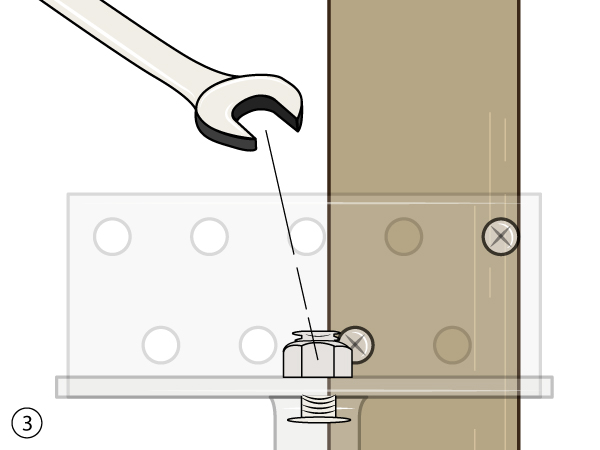
3. Fixing: Use only stainless steel screws
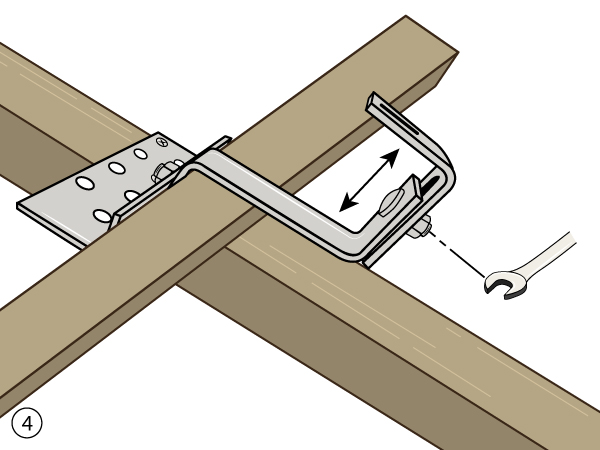
4. Adjustment: Adjust height with vertical adjustment system
5. Finishing: Carefully replace top tile
⭐ Tile system benefits
- Watertightness: Maintains the integrity of the roof
- Strength: Attaches directly to the rafters
- Adjustment: Double-adjustment system for perfect fit
✅ Controls
Solid fixing Stainless steel screws used Height adjusted Tile replaced
📦 Hardware
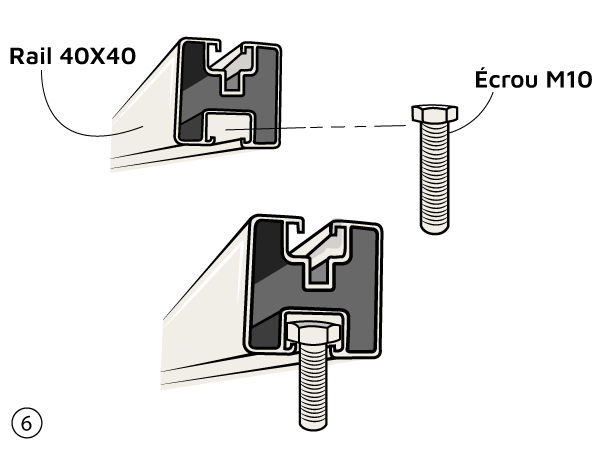
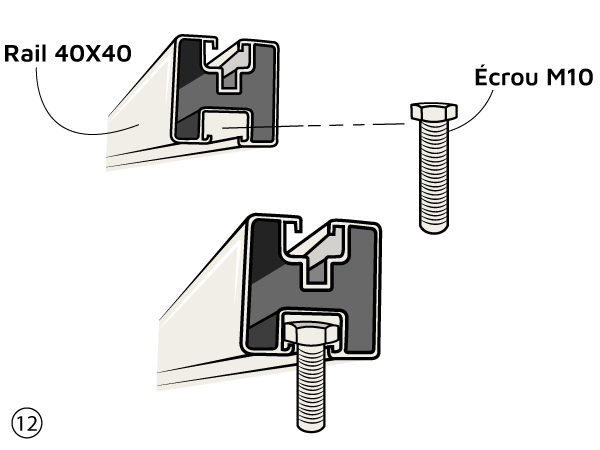
40x40 aluminum rails, M10 bolts, nuts, wrench
🔧 Installation
1. Insertion: Slide an M10 bolt into the square rail guide.
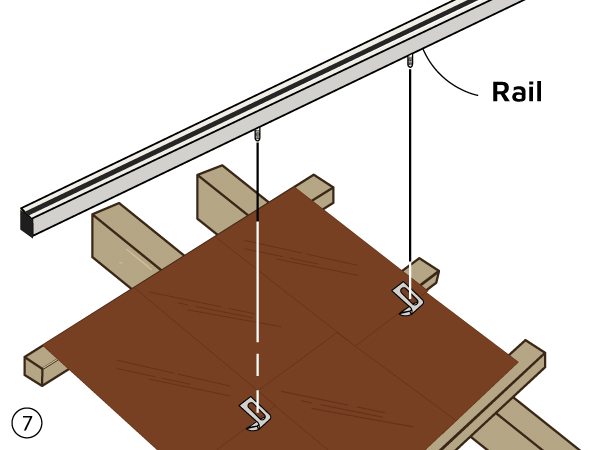
2. Positioning: Insert the bolt into the oblong hole of the hook.
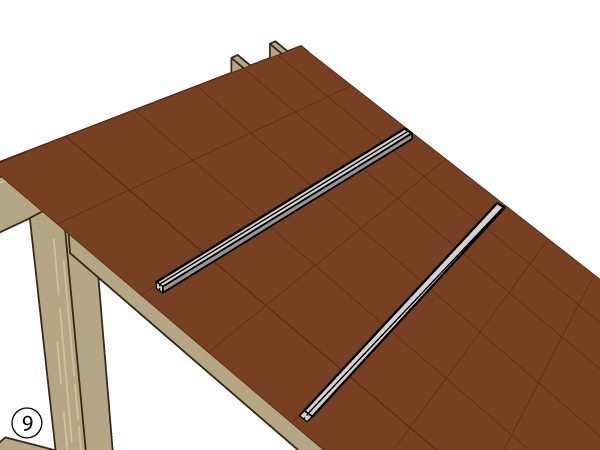
3. Alignment: Check for perfect alignment before final tightening.
4. Adjustment: Align parallel to the roof
⭐ Advantages aluminum rails
- Lightweight: Strong, lightweight aluminum material
- Precision: Square slide for exact positioning
- Durability: Optimal weather resistance
✅ Controls
Rails aligned Bolts tightened Roof parallelism Solid fastening
📦 Hardware
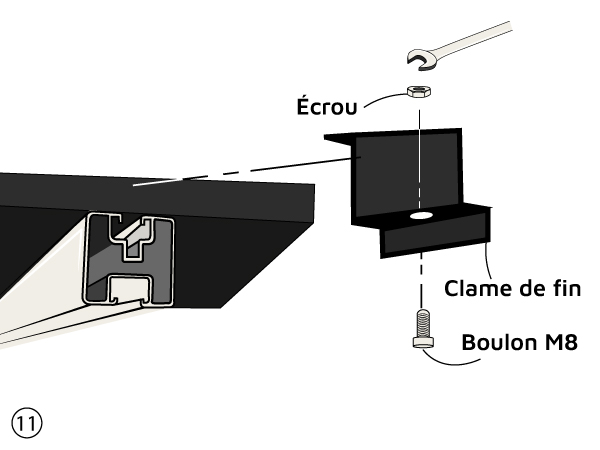
End clamps (4), middle clamps (depending on config.), M8 bolts
⚙️ Cam configuration
1 panel: 4 end slats at 4 corners
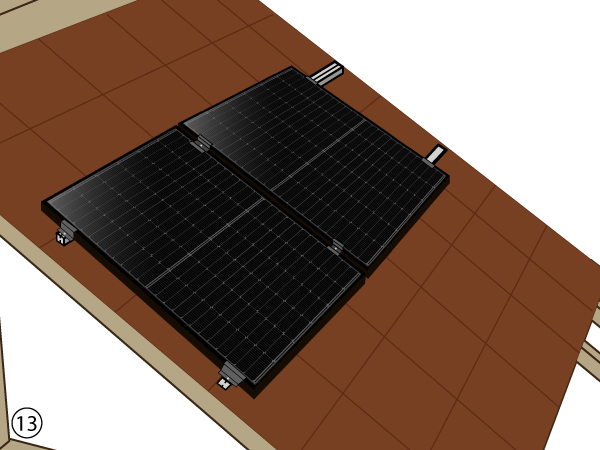
Several panels: 4 end clamps + middle clamps between panels
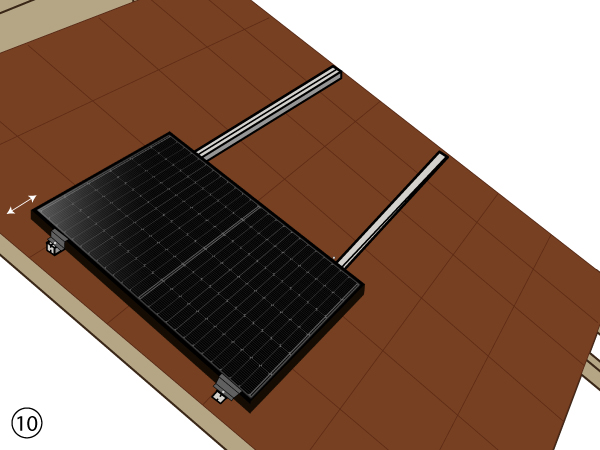
🔧 Installation
1. Positioning: Start at an outer edge with 1 cm margin.
2. Clamps: Attach two outer clamps to the ends
3. Checking: Check parallelism with ridge cap
4. Joining: Use middle clamps to join the panels.
⭐ Advantages
- Safety: Firm hold, weather resistance
- Flexibility: Modular system, can be dismantled
- Precision: Exact positioning, perfect alignment
✅ Controls
Well-positioned slats Margin respected Ridge parallelism Stable installation
🎉 Installation complete!
Your photovoltaic system on a tiled roof is now ready. Please make a final check of all fastenings and panel alignment before commissioning.
⚠️ For your own safety, have your system checked by a qualified professional.